
WapBlaster’s bot flow builder lets you design guided WhatsApp journeys without writing code. This walkthrough shows how to start a flow, add steps and branches, and connect the paths so customers are guided to the right outcome.
Step 1: Start a new bot flow
Open the bot flow builder and create a new flow. Give it a clear name so your team knows what journey it handles, such as lead capture or FAQ routing.
Step 2: Add steps and questions
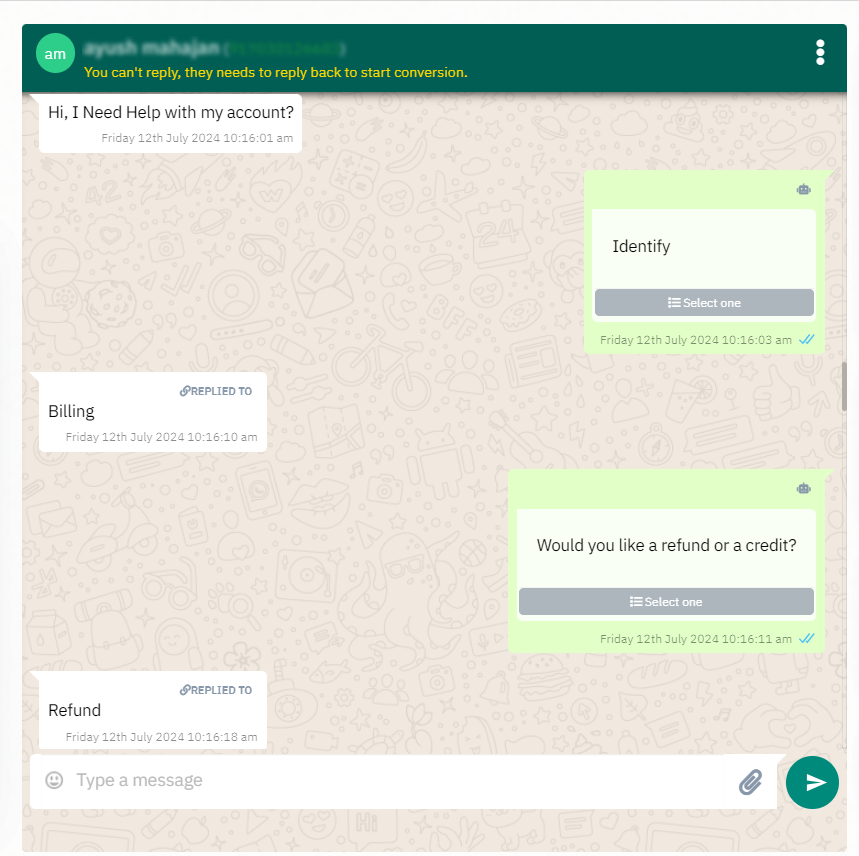
Add the messages and questions the flow should ask. Keep each step short and explain why you are asking, so the conversation feels helpful rather than robotic.
Step 3: Branch based on replies
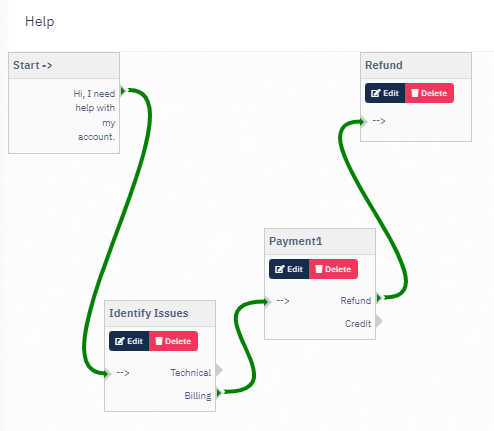
Create branches so different answers lead to different paths. This is how a single flow can qualify a lead, answer a question, or route to the right team.
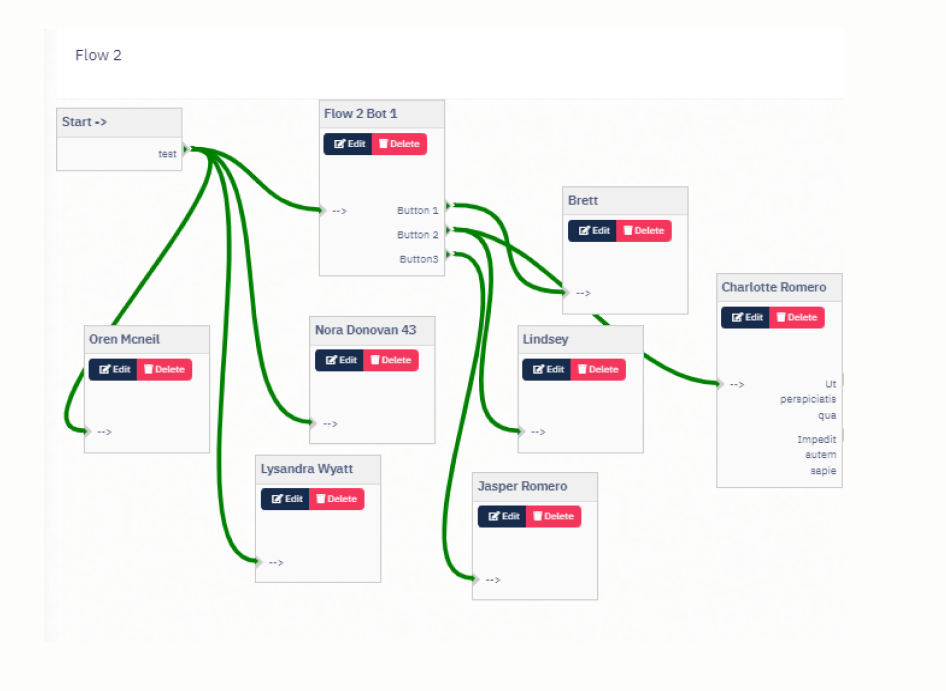
Step 4: Connect a human handoff
Add a clear path to a human agent for complex or high-value questions, so automation never becomes a dead end for the customer.
Step 5: Publish and monitor
Activate the flow, then review where customers drop off or get transferred so you can refine the journey over time.
Helpful next reads
How to set up the AI chatbot, WhatsApp chatbot feature page, WhatsApp automation workflows.
Frequently asked questions
Do I need coding skills to build a WhatsApp bot flow?
No. WapBlaster’s builder is no-code: you add steps, questions and branches visually, then publish the flow without writing any code.
Can one bot flow handle different customer intents?
Yes. By branching on replies, a single flow can qualify leads, answer FAQs, or route conversations to the right team based on what the customer chooses.
How do I improve a bot flow after publishing?
Review where customers drop off or get transferred to a human, then adjust the wording, steps or branches to remove friction.